How to Add a User to Google Search Console
By: Ed Harris / Published: June 14, 2022 / Last updated: June 28, 2024
Follow the steps below to add a user to an existing Google Search Console property. You may want to share access with a team member, or provide access to an SEO or digital marketing consultant
Share Google Search Console Access: Step-by-Step Instructions
1. Log in to your Google Search Console account
Navigate to https://search.google.com/search-console/ in your browser and log in to your Google Search Console account.
Make sure you are logged in using the Google account that is the Owner the website property you want to share (see more detail about Google Search Console permissions below).
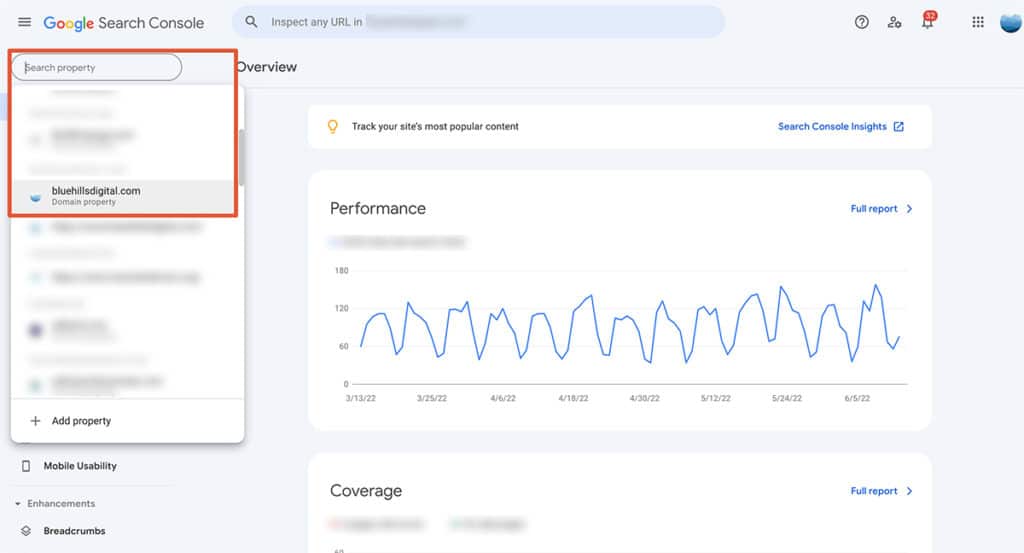
2. Select the property you want to share
If you have access to more than one website property in Google Search Console, make sure the correct property is selected in the drop-down menu on the top-left side of the screen:
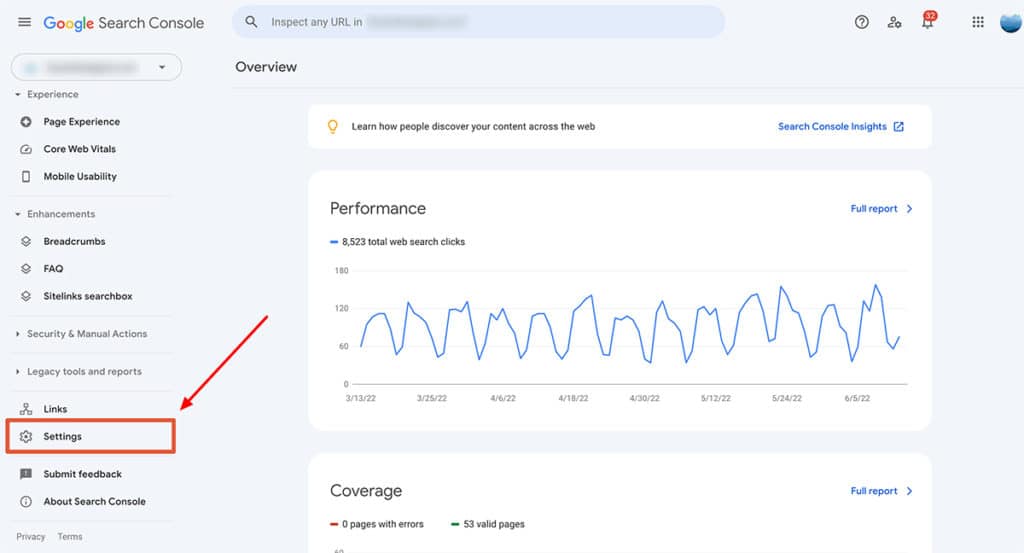
3. Open the Settings menu
Click on the Settings link at the bottom of the left menu bar:
4. Open the Users and Permissions settings
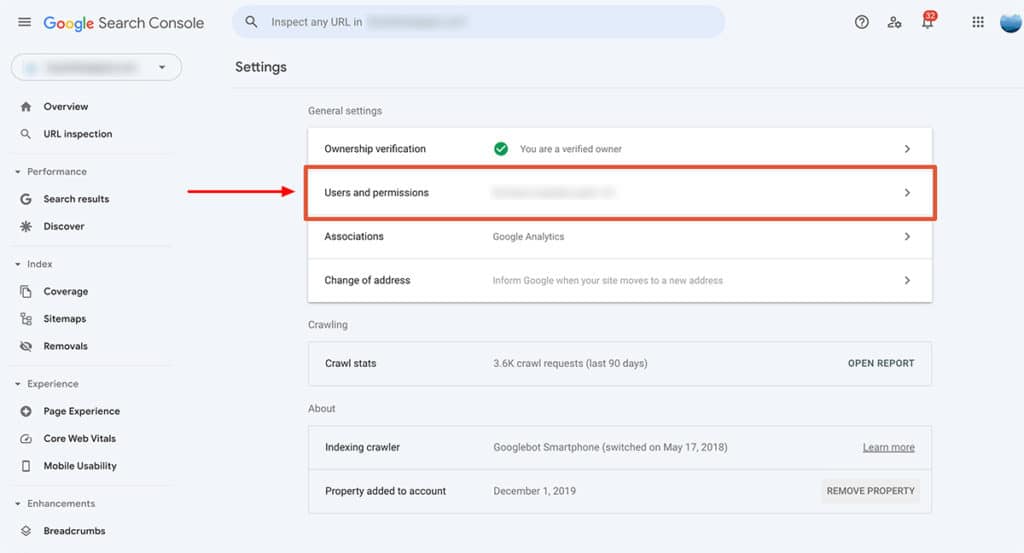
Click on the Users and permissions section of the Settings screen:
5. Add a user
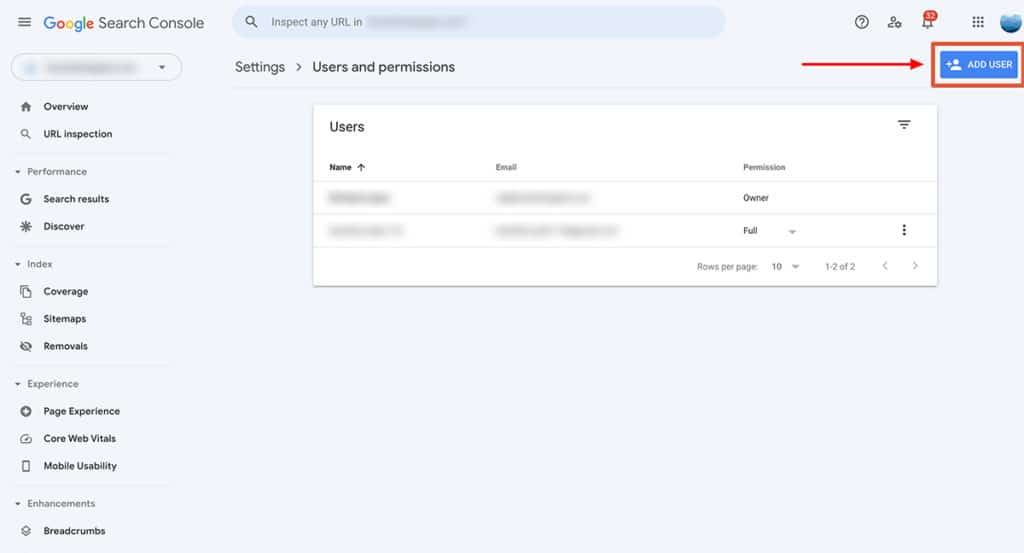
Click on the blue “Add User” button top-right:
6. Add user details
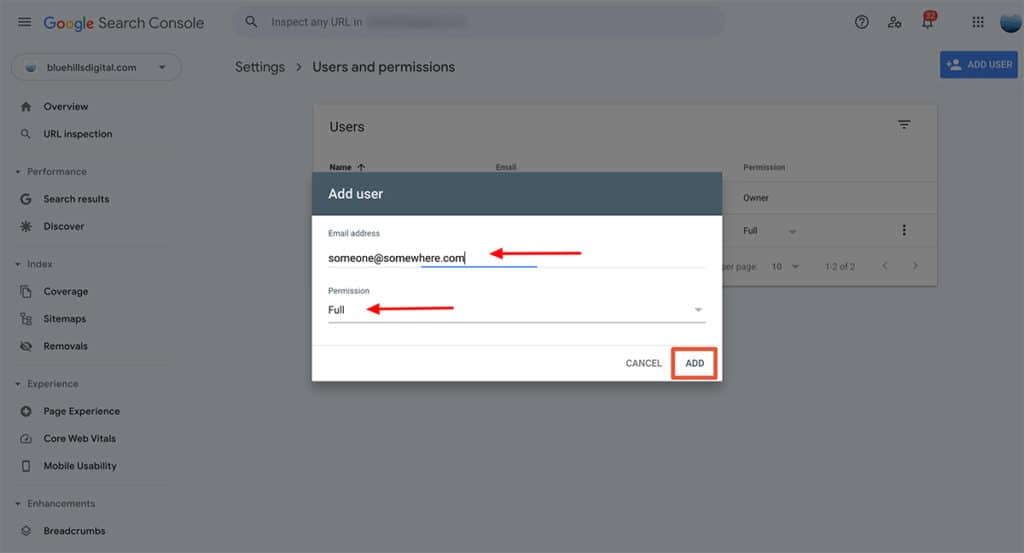
In the Add User window that pops up, enter the email address for the person you need to add in the email field, and select the appropriate permissions level. Then click the Add button to complete the process.
If you are following this guide because you are working with Blue Hills Digital, check your onboarding materials for the correct email address to use and select the Full permissions level.
For more detail on Google Search Console User Permissions, keep reading!
Google Search Console Permission Levels
There are three permission level options to choose from when you add a user to a Google Search Console property:
Owner
Every Search Console Property has to have at least one Verified Owner (a user that has completed the property verification process). Additional users with Owner level permissions are classified as Delegated Owners.
Full
Users with Full permissions have view access to all data, and can perform some actions including verifying fixes, submitting URL indexing requests.
Restricted
Restricted users have view only access to most data.
To view a complete list of actions allowed for each permission level, review the Google Search Console Users and Permissions documentation.
Change a User’s Permission Level
To change the permission level for a user you’ve already added to your account, follow steps 1 to 4 above to navigate to the Users and Permissions settings.
Then use the drop down menu in the Permission column to select a new permission level for the user you need to update.
Disclosure: some of the links below are affiliate links, meaning that at no cost to you, we will earn a commission if you click through and make a purchase. Learn more about the products and services we recommend here.
Set up position tracking for your most important keywords
Google Search Console provides valuable insight into the search queries (or keywords) that are bringing visitors to your website from Google searches.
If you’re working as part of a team, you may want to try a tool that allows you to track the position your webpages have in the search engine results page (SERP) rankings for the keywords that are most important for your work, and share position tracking reports with all team members.
Google Search Console doesn’t offer keyword position tracking, but several third-party SEO tools include position tracking in their product suites. Both Semrush or SE Ranking offer keyword position tracking reports that can be shared with multiple team members.
In both cases, you’ll need to input a list of keywords you want to track (Google Search Console query reports will help here). Once position tracking is set up, you can share the dashboards across your team, and even schedule updates via email when keyword positions change.
If you need more help or guidance about setting up keyword position tracking, get in touch.

